The Simple Secret: Just Two Ingredients for Homemade Yogurt
Imagine a world where your daily dose of creamy, probiotic-rich yogurt is not only incredibly fresh but also completely free of hidden sugars, artificial flavors, and thickeners. This isn't a culinary dream, it's the reality of making homemade yogurt, and it’s surprisingly simple. Forget complicated recipes or specialized skills; you truly only need two core ingredients to embark on this rewarding journey.
The beauty of crafting your own yogurt at home lies in its simplicity and the profound control it gives you over what you consume. Whether you're a seasoned chef or a kitchen novice, learning how to make homemade yogurt is a game-changer for your health, your wallet, and your taste buds. Many people, like families moving to new places and seeking healthier options, discover this delicious secret and never look back. It’s an affordable, healthy, and surprisingly fun process that yields delicious, probiotic-rich results.
Unveiling the Dynamic Duo: Milk and Starter Culture
At its heart, homemade yogurt is a product of intelligent microbiology. Live bacterial cultures ferment milk, transforming its natural sugars into lactic acid. This acid not only thickens the milk but also gives yogurt its characteristic tangy flavor and distinct texture. The two essential players in this transformation are:
- Milk: Your Canvas for Creaminess
The type of milk you choose will significantly influence the final texture and richness of your homemade yogurt. While virtually any dairy milk can be used, here’s a breakdown:
- Whole Milk: For the ultimate in creaminess and a rich, luxurious texture, whole milk is generally the preferred choice. It produces a thick, satisfying yogurt that feels indulgent.
- Reduced-Fat Milk (1% or 2%): If you prefer a lighter yogurt, lower-fat milks work perfectly well. The resulting yogurt will be slightly less thick but still delicious and nutritious.
- Lactose-Free Milk: Pre-treated with the lactase enzyme, lactose-free milk can also be used to create homemade yogurt for those with sensitivities.
- Ultra-Pasteurized Milk: This type of milk has been heated to a higher temperature during processing, meaning it requires less initial heating when you're making yogurt – usually just warming it to the culturing temperature. This can shave a few minutes off your prep time.
Experimentation is key here to find your perfect texture profile!
- Starter Culture: The Live Heart of Your Yogurt
This is where the magic truly happens. A yogurt starter is a small amount of live bacterial culture that kick-starts the fermentation process. You have two main options:
- Dehydrated Yogurt Culture: These are packets of freeze-dried bacteria specifically designed for yogurt making. They offer consistent results and can be a good choice for your first batch.
- Plain Yogurt with Live Active Cultures: The most common and often easiest starter is a few tablespoons of store-bought plain yogurt that clearly states "live active cultures" on its label. Ensure it's unsweetened and unflavored to avoid unwanted additives. This option makes it incredibly convenient, as you likely already have it in your fridge or can easily pick some up.
The starter culture ferments the lactose in the milk into lactic acid, which causes the milk proteins to coagulate, resulting in thick, tangy yogurt. The quality and freshness of your starter are crucial for a successful batch.
Your Step-by-Step Guide to Crafting Creamy Homemade Yogurt
Ready to transform milk into a probiotic powerhouse? Here's how to do it, keeping the process simple yet reliable.
Preparation: Heating and Cooling the Milk
The first crucial step is preparing your milk. Heating the milk serves a dual purpose: it denatures the proteins, helping to create a thicker yogurt, and it eliminates any undesirable bacteria that might compete with your starter culture.
- Heat the Milk: Pour your chosen milk into a clean pot. Gently heat the milk over medium heat. For a standard, creamy yogurt, aim to bring the milk to about 180°F (82°C). Some recipes suggest heating to this higher temperature to achieve an even thicker set, even though the actual culturing happens at a lower temperature. This step helps break down milk proteins, allowing for a firmer final product.
- Prevent Boil-Over (Optional but Recommended): A clever trick to prevent the milk from boiling over is to place a wooden spoon across the top of the pot. The spoon helps to break the surface tension, preventing foam from bubbling up and spilling.
- Cool the Milk: Once the milk reaches 180°F (or just starts to steam and shimmer if you don't have a thermometer), remove it from the heat. Now, you must cool it down to the ideal culturing temperature of 110-115°F (43-46°C). This temperature range is perfect for the live active cultures to thrive without being killed by excessive heat. You can speed up cooling by placing the pot in an ice bath, stirring occasionally, or simply letting it sit at room temperature. Check the temperature with a thermometer.
Culturing: Introducing Your Starter
Once your milk is within the 110-115°F range, it's time to introduce your starter culture:
- Temper and Mix: Take a small amount of the warmed milk and mix it thoroughly with your starter culture in a separate bowl. This helps to temper the starter and ensures it disperses evenly.
- Combine: Pour the tempered starter mixture back into the main pot of milk. Stir gently but thoroughly to ensure the cultures are evenly distributed throughout the milk.
Mastering Incubation: Methods for Consistent Results
Incubation is where the magic of fermentation truly happens. The goal is to maintain a consistent temperature of around 110°F (43°C) for several hours. This allows the bacteria to convert lactose into lactic acid, thickening the milk into yogurt. While a dedicated yogurt maker offers the most consistent results, several other kitchen appliances can do the job beautifully.
The Yogurt Maker Advantage
For unparalleled consistency, an electric yogurt maker is an excellent investment. It maintains the ideal incubation temperature with minimal fuss. Simply pour your inoculated milk into the yogurt maker's container(s), set the timer, and let it do its work.
Flexible Incubation Methods: Using What You Have
Don't have a yogurt maker? No problem! Here are some common alternatives:
- Instant Pot: Many Instant Pot models have a "Yogurt" function. Simply pour the prepared milk into the liner, select the yogurt setting, and choose your incubation time. The Instant Pot will handle both the heating (if needed for ultra-pasteurized milk) and the incubation.
- Slow Cooker: After preparing your milk, pour it into your slow cooker. Cover, and set it to the lowest "Warm" setting. Monitor the temperature periodically to ensure it stays within the 100-115°F range. You might need to turn it on and off to maintain the ideal temperature.
- Oven with a Proof Setting: If your oven has a "Proof" setting (often around 100-115°F), it's perfect for incubating yogurt. Place your covered container of inoculated milk in the oven and let it sit for the required time. If your oven doesn't have a proof setting, you can use the oven light for a gentle warmth, or preheat the oven slightly, turn it off, and then place the yogurt inside, repeating this process if the temperature drops too much.
- DIY Cooler Method: For a low-tech approach, pour your inoculated milk into jars, cover them, and place them in a cooler filled with warm water (around 110-115°F). Close the cooler and let it sit for several hours, replenishing warm water if needed.
Incubation Time and What to Expect
Incubation typically takes 6-12 hours, depending on your desired tanginess and thickness. Longer incubation times generally result in tangier, thicker yogurt. Once done, the yogurt should be set and jiggly, not liquid. After incubation, carefully transfer your yogurt to the refrigerator. Chilling helps the yogurt to set further and halts the fermentation process. I often leave my homemade yogurt in the fridge for 1 to 2 days before I use it, as this can allow the flavors to deepen and the texture to firm up even more, though it's not strictly required.
Beyond the Bowl: Maximizing Your Homemade Yogurt's Potential
One of the greatest joys of making homemade yogurt is the sheer versatility it offers. Once you've mastered the basic process, a world of culinary possibilities opens up.
Health, Customization, and Culinary Uses
Making yogurt at home empowers you to take full control of your diet. You can significantly reduce or eliminate added sugars, artificial sweeteners, and preservatives commonly found in store-bought varieties. This commitment to healthier eating is a primary motivator for many Make Your Own Healthy Yogurt: Control Sugar & Additives. You can flavor it with fresh fruits, honey, maple syrup, or vanilla extract – precisely to your liking.
Your homemade yogurt is not just for breakfast. It's an incredibly useful ingredient across a spectrum of recipes:
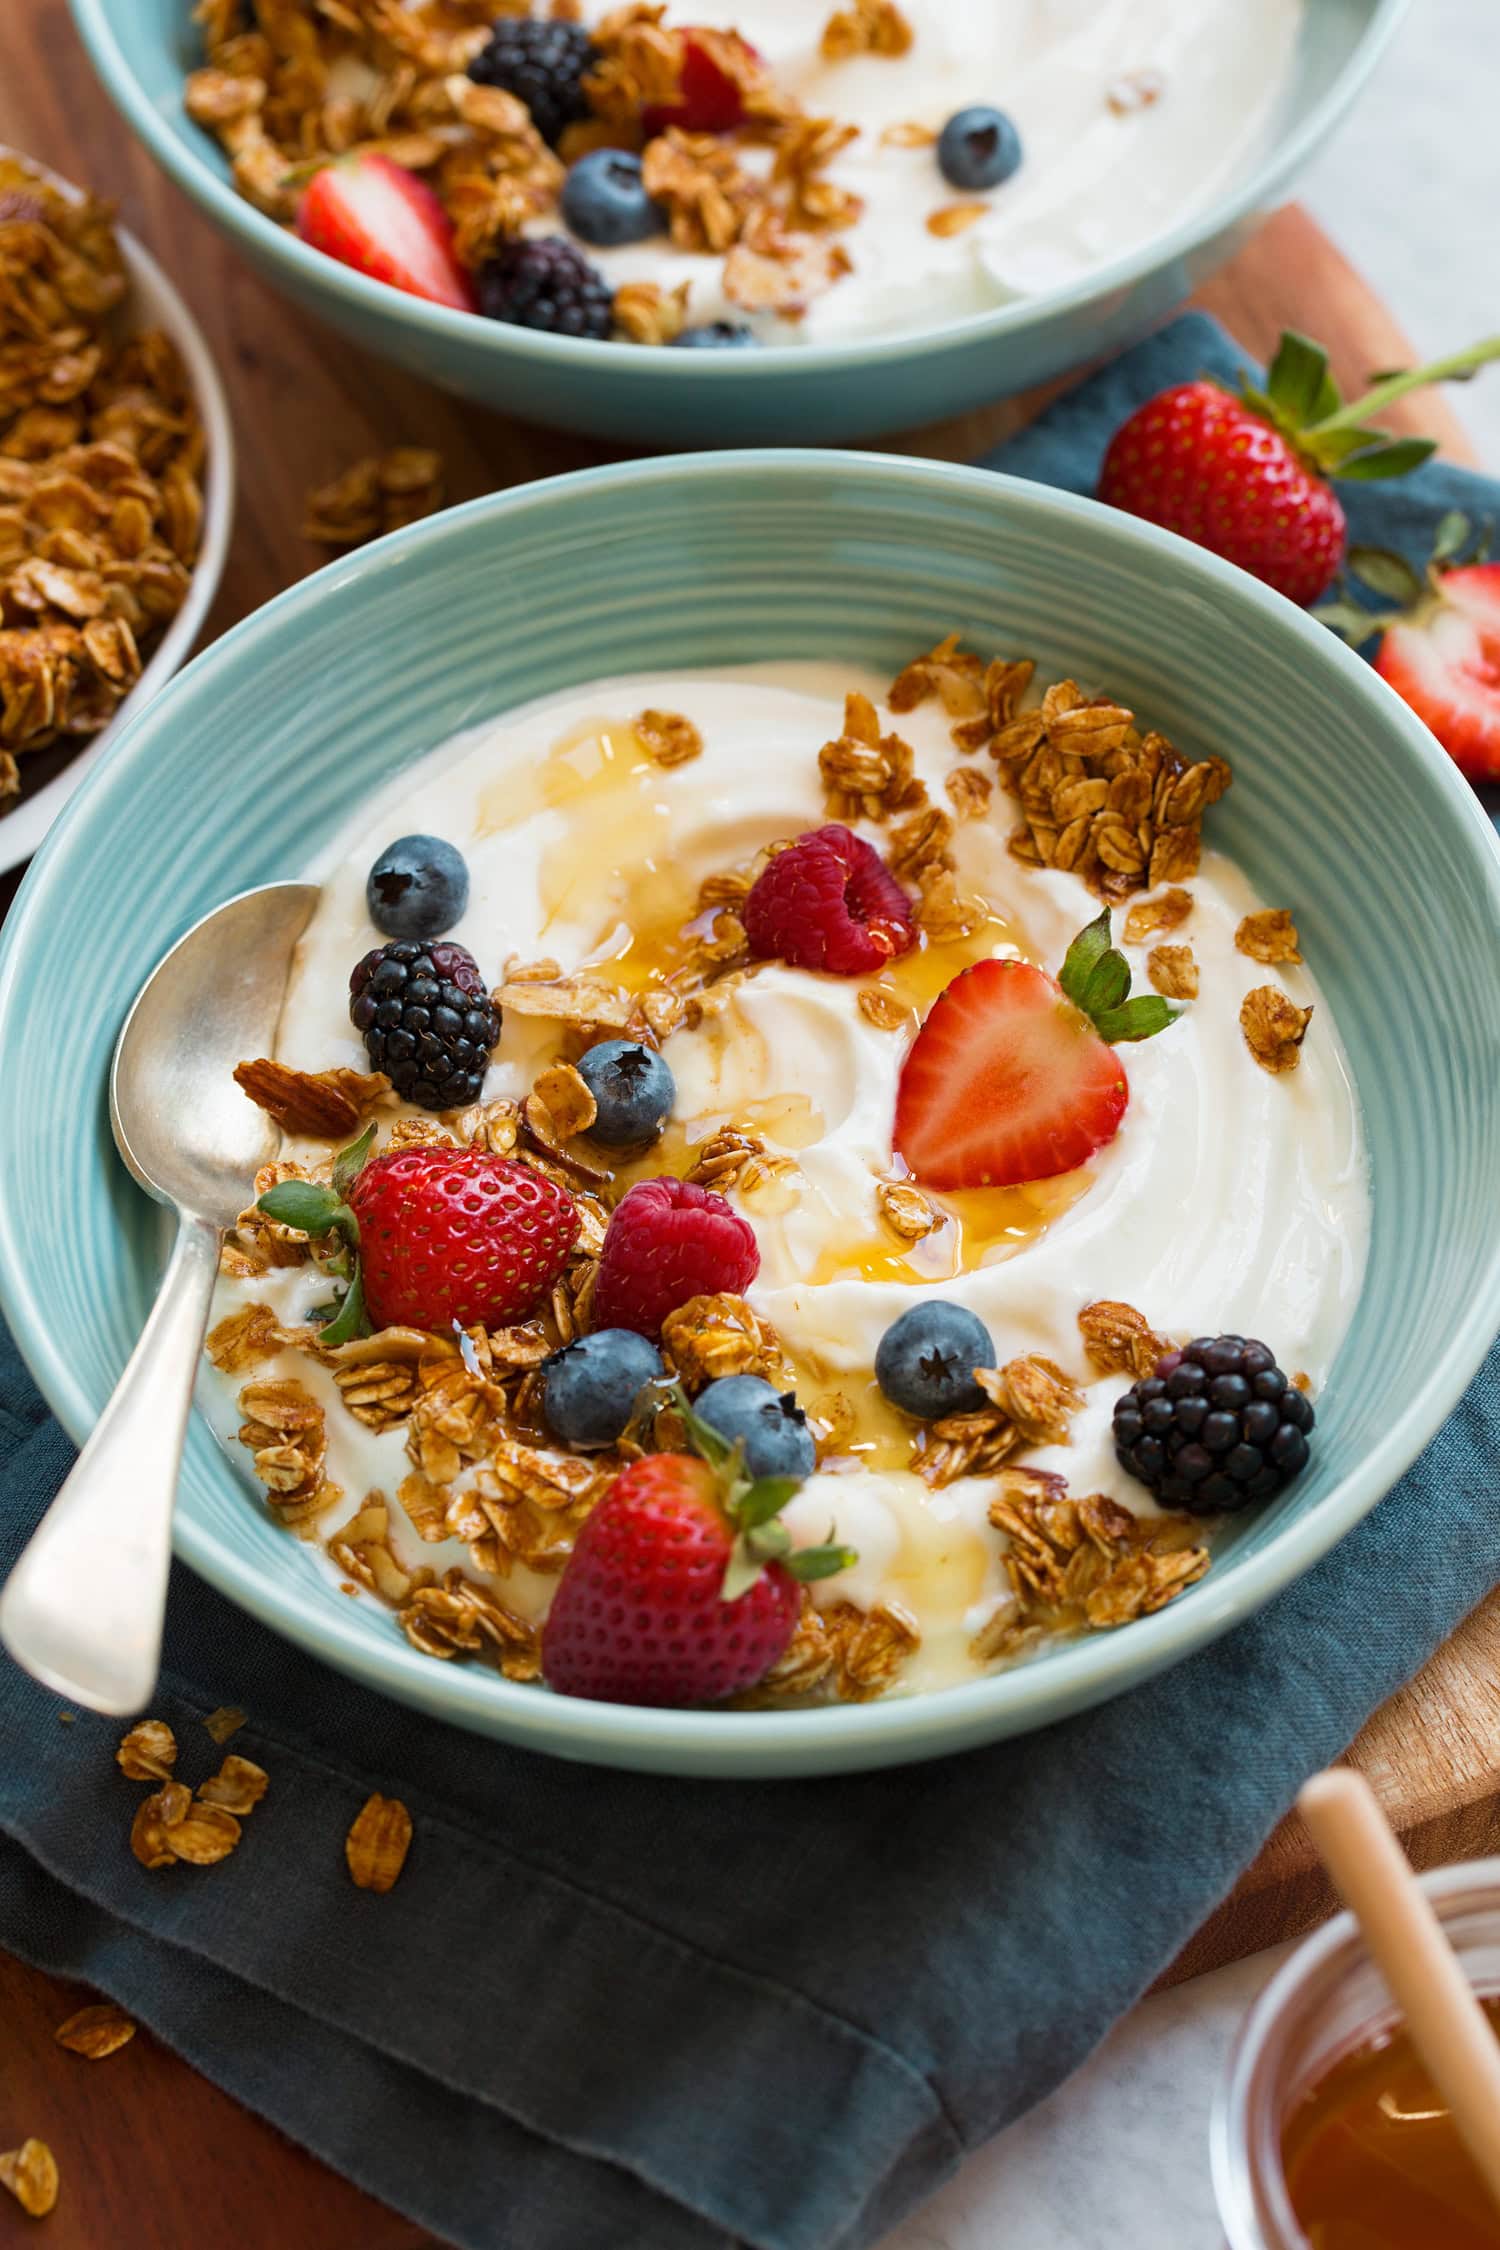
- Breakfast Bliss: Enjoy it plain, with granola, fresh berries, nuts, or a drizzle of honey for a wholesome start to your day.
- Smoothie Sensation: It adds a creamy texture and probiotic boost to any fruit or vegetable smoothie.
- Dips and Dressings: A fantastic base for savory dips (like tzatziki) or creamy salad dressings.
- Marinades and Sauces: The lactic acid in yogurt helps tenderize meat, making it an ideal marinade ingredient. It also forms the base of many flavorful sauces for poultry and vegetables.
- Baking: Substitute it for buttermilk or sour cream in recipes to add moisture and a slight tang to baked goods.
- Greek Yogurt and Labneh: For an extra-thick, protein-packed treat, you can easily strain your homemade yogurt through cheesecloth or a fine-mesh sieve. The liquid whey will drain off, leaving you with rich Greek yogurt or even thicker, spreadable labneh.
Troubleshooting & Tips for Your Best Homemade Yogurt
Even with the simplest recipes, a few tips can elevate your experience and ensure consistent success with your homemade yogurt.
- First Attempt Imperfections: Don't be discouraged if your very first batch of homemade yogurt isn't absolutely perfect. Store-bought yogurts often contain additives that create a super-consistent texture. Your homemade version might be a little thinner or have a slightly different tang. This is normal!
- Saving for Next Time: Always save about one cup of your freshly made plain yogurt to use as a starter for your next batch. This is an economical and effective way to perpetuate your yogurt-making cycle. Even if the saved yogurt base gets a bit sour after a few days, it's perfectly fine to use as a starter; the next batch will still turn out beautifully.
- Shelf Life and Sourness: Because this is homemade and additive-free, your yogurt will naturally get sour after about 7 to 10 days. Enjoy it up by then! Remember, keeping a cup for your next starter is key, even if it's on the tangier side.
- Temperature is King: Consistency in temperature during incubation is paramount. Too cold, and the cultures won't activate; too hot, and they'll die. Aim for that sweet spot of 110-115°F (43-46°C). For more advanced tips on achieving the perfect consistency, refer to a Homemade Yogurt Guide: Easy Methods for Creamy Results.
- Scaling Down: If you're new to making yogurt, consider halving the recipe for your first attempt. It's a great way to get comfortable with the process without committing to a large batch.
Making homemade yogurt is a rewarding culinary adventure that empowers you with control over your food and introduces you to a world of fresh, healthy possibilities. With just two ingredients and a little patience, you can consistently produce delicious, probiotic-rich yogurt tailored precisely to your preferences. Embrace the process, enjoy the results, and savor the satisfaction of creating something wonderful from scratch!
