Make Your Own Healthy Yogurt: Control Sugar & Additives for Optimal Health
Tired of deciphering lengthy ingredient lists on store-bought yogurt containers, only to find them loaded with hidden sugars, artificial flavors, and thickeners? You're not alone. Many health-conscious individuals are seeking healthier alternatives, and the answer might be simpler – and more delicious – than you think: learning to make your own
homemade yogurt. It’s an empowering culinary journey that puts you firmly in control of what goes into your body, ensuring a truly nourishing and delicious product every time.
Forget the notion that making yogurt at home is a complex, time-consuming endeavor. With just a couple of ingredients and some basic kitchen equipment, you can whip up batches of fresh, creamy, probiotic-rich yogurt that far surpasses its commercial counterparts in both taste and health benefits. This guide will walk you through the surprisingly simple process, reveal the science behind the magic, and equip you with all the tips and tricks to master the art of homemade yogurt.
Why Embrace Homemade Yogurt? The Benefits You Can't Ignore
The primary draw of making your own yogurt is the unparalleled control it offers. In an age where processed foods dominate supermarket shelves, the ability to dictate every ingredient is invaluable.
*
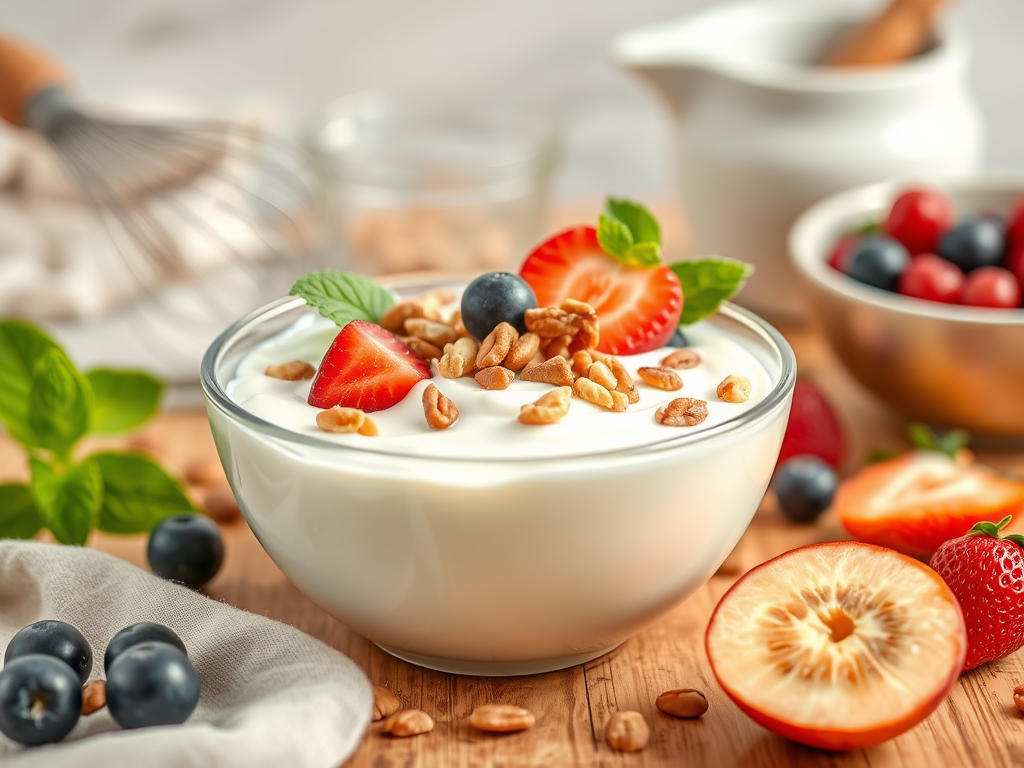
Unrivaled Sugar Control: This is arguably the biggest game-changer. Commercial yogurts often contain astonishing amounts of added sugar, turning a seemingly healthy snack into a dessert. When you make yogurt at home, you decide if and how much sweetener to add – typically *after* the fermentation process, allowing you to enjoy the natural tang or sweeten it with wholesome alternatives like fresh fruit or a drizzle of honey.
*
Freedom from Unwanted Additives: Say goodbye to stabilizers, artificial colors, preservatives, and thickeners. Your homemade yogurt will be pure, made only from milk and live bacterial cultures. This means a cleaner, more natural product for you and your family.
*
Boosted Probiotic Power: Store-bought yogurts *can* contain live cultures, but the potency can vary. Freshly made
homemade yogurt ensures a vibrant, active culture that contributes significantly to gut health, aiding digestion and supporting your immune system.
*
Cost-Effectiveness: While the initial outlay for milk and a starter culture is necessary, making your own yogurt quickly proves to be far more economical than regularly purchasing premium commercial brands. A single batch of homemade yogurt can often cost less than half the price of its store-bought equivalent.
*
Customization Galore: Once you master the basic technique, the possibilities are endless. Adjust the thickness to your preference, strain it to make rich
homemade Greek yogurt, or even transform it into creamy labneh. Experiment with different types of milk – from whole for the creamiest texture to 1% or 2% for a lighter option, or even lactose-free milk for those with sensitivities.
The Simple Science Behind Your Creamy Homemade Yogurt
At its heart, yogurt making is a fascinating act of controlled fermentation. It's a testament to how two simple ingredients can create something so rich and complex.
*
The Essential Duo: Milk and Starter Culture:
*
Milk: This is your canvas.
Whole milk yields the richest, creamiest yogurt, but lower-fat milks like 2% or 1% also work well, resulting in a lighter texture. Even ultra-pasteurized milk can be used, often requiring less initial heating.
*
Yogurt Starter Culture: This is the magic ingredient. It's a small amount of live bacterial culture – either a specialized dehydrated starter available online or in health food stores, or a few tablespoons of plain yogurt from a previous batch or a store-bought brand explicitly labeled with "live active cultures." These beneficial bacteria are the agents of transformation.
*
The Fermentation Process:
The process begins by warming milk to a specific temperature, typically around 110°F (43°C). At this ideal temperature, the live active cultures in your
yogurt starter culture get to work. They begin to ferment the milk, converting the lactose (milk sugar) into lactic acid. This lactic acid is what gives yogurt its characteristic tangy flavor and causes the milk proteins to thicken, transforming the liquid milk into the creamy consistency we know and love. For a visibly thicker set, some recipes suggest heating milk to 180°F (82°C) first, then cooling it, as this denatures proteins, making them set more firmly.
Your Step-by-Step Guide to Making Homemade Yogurt
Making yogurt at home is genuinely easier than most people expect. With a clear understanding of the steps and a little patience, you'll be enjoying your own fresh batches in no time. For a fundamental approach needing just two items, check out our guide on
Easy Homemade Yogurt: Just Two Ingredients Needed.
1.
Gather Your Tools and Ingredients: You'll need a clean pot, a thermometer (essential!), a whisk, a glass jar or containers for incubation, and your two stars: milk and a starter culture.
2.
Heat the Milk: Pour your desired amount of milk into a clean pot.
* If using standard pasteurized milk and aiming for a thicker yogurt, heat it to 180°F (82°C). This step helps denature the milk proteins, resulting in a firmer set. A handy tip: leaving a wooden spoon across the top of the pot can help prevent the milk from boiling over.
* If using ultra-pasteurized milk, or if you prefer a simpler, slightly thinner yogurt, you only need to warm it to the culturing temperature of 110°F (43°C).
3.
Cool the Milk (if necessary): If you heated the milk to 180°F, you must now cool it down to the optimal culturing temperature of 110°F (43°C). You can do this by placing the pot in an ice bath or simply letting it sit at room temperature, stirring occasionally. Don't add the starter when the milk is too hot, or it will kill the beneficial bacteria!
4.
Add the Starter Culture: Once the milk reaches 110°F (43°C), ladle out about a cup of warm milk into a separate bowl. Whisk in your yogurt starter culture until thoroughly dissolved and smooth. Then, pour this mixture back into the main pot of milk and whisk gently to combine.
5.
Incubation: This is where the magic happens, and consistency is key. You need to maintain the temperature at roughly 110°F (43°C) for several hours.
*
Electric Yogurt Maker: These devices are designed for consistent results, maintaining the ideal temperature automatically.
*
Instant Pot: Many models have a "Yogurt" function, simplifying the process.
*
Slow Cooker: Some slow cookers can maintain a low-enough temperature; you might need to experiment or use a towel to insulate.
*
Oven with Proof Setting: An oven with a proof setting can also maintain the required low temperature.
*
Cooler/Thermos Method: For a low-tech solution, pour the mixture into a pre-warmed thermos or a jar placed in a cooler filled with warm water.
Pour the inoculated milk into clean jars or your yogurt maker's container. Incubate for 6-12 hours. The longer it ferments, the tangier and often thicker your yogurt will become.
6.
Chill: Once your yogurt has reached your desired tanginess and consistency, remove it from the incubator. Cover the containers and transfer them to the refrigerator to chill for at least 4 hours. Chilling not only stops the fermentation process but also helps the yogurt thicken further.
Maximizing Your Homemade Yogurt Experience: Tips & Troubleshooting
Even seasoned chefs have their off days, so don't be disheartened if your first attempt at
homemade yogurt isn't absolutely perfect. It's a learning process, and often, the slightest adjustments can yield fantastic results.
*
First Batch Nerves? Don't Worry! If your first batch doesn't turn out as thick or creamy as you hoped, don't discard it! Save one cup to use as the starter for your *next* batch. Often, subsequent batches improve dramatically as your starter culture becomes more robust and accustomed to your process.
*
Sourness is Normal: Because this is homemade, expect your yogurt to develop a more pronounced tang. It will naturally get sour after about 7 to 10 days in the fridge. Use it up by then, but remember to save a cup for your next starter! Even if your saved starter is quite sour, it will still produce delicious, fresh-tasting yogurt.
*
Achieving Optimal Thickness:
* If your yogurt is too thin, ensure your incubation temperature was consistently around 110°F and that it incubated long enough (at least 6-8 hours). Using whole milk and heating to 180°F initially can also significantly boost thickness.
* For truly thick, Greek-style yogurt, strain your finished, chilled yogurt through cheesecloth or a fine-mesh sieve lined with coffee filters for several hours (or overnight) in the refrigerator. The liquid whey that drains off can be used in smoothies or baking.
*
Flavoring Your Creation: The beauty of homemade plain yogurt is its versatility. Add your favorite flavorings *after* the yogurt has chilled. This is your chance to control sugar! Stir in fresh fruits, a touch of maple syrup or honey, vanilla extract, cinnamon, or even savory elements like herbs and spices for dips and sauces.
*
Storing Your Starter for Future Batches: Always set aside about 1/2 to 1 cup of your freshly made plain yogurt (before flavoring!) to use as a starter for your next batch. Store it in an airtight container in the refrigerator. This "mother culture" can last for about 7-10 days, ensuring a continuous supply of homemade goodness.
Embrace the Homemade Revolution
Making your own
healthy yogurt is a rewarding experience that extends far beyond just culinary satisfaction. It's about taking charge of your health, understanding your food, and enjoying truly fresh, unadulterated flavors. With the ability to control sugar and additives, customize to your heart's content, and save money in the process, there's every reason to dive into the world of homemade yogurt. So, grab your milk and your starter, and get ready to enjoy the most delicious, wholesome yogurt you've ever tasted – made right in your own kitchen!